
At a glance
Configure a connector in 4 steps using an API key or personal access token. This guide covers each step of the configuration wizard.
Before you start
- Access to an Ontologie workspace
- API key or personal access token for the external service
- (Optional) Target entity created in the ontology for linking
Steps
Step 1 : Choose the connector and enter credentials
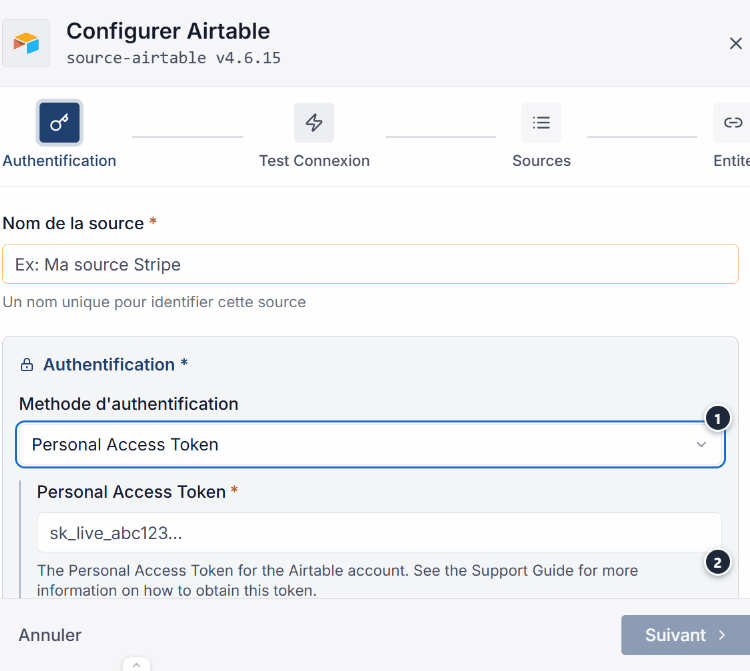
From Live Data > Connectors, click the desired connector.
The configuration panel opens. Select API Key as the authentication method.
Enter your API key or token in the provided field.
Step 2 : Test the connection
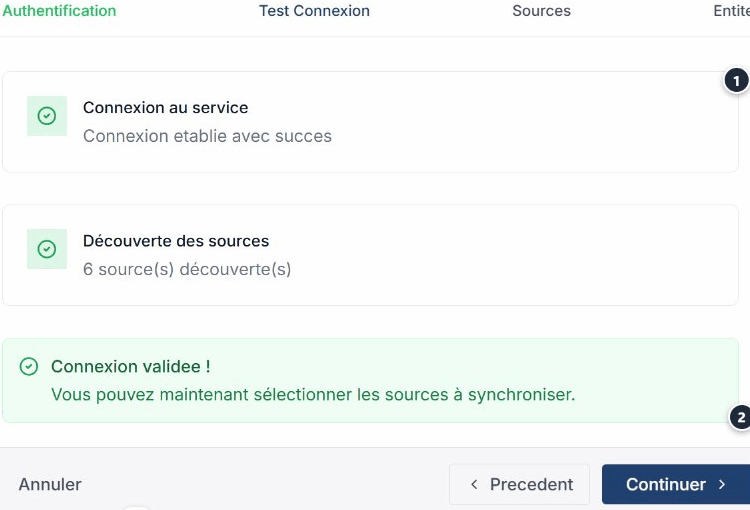
Click Test connection to verify that Ontologie can connect to the source.
If an error occurs, a message is displayed with details to help fix the issue.
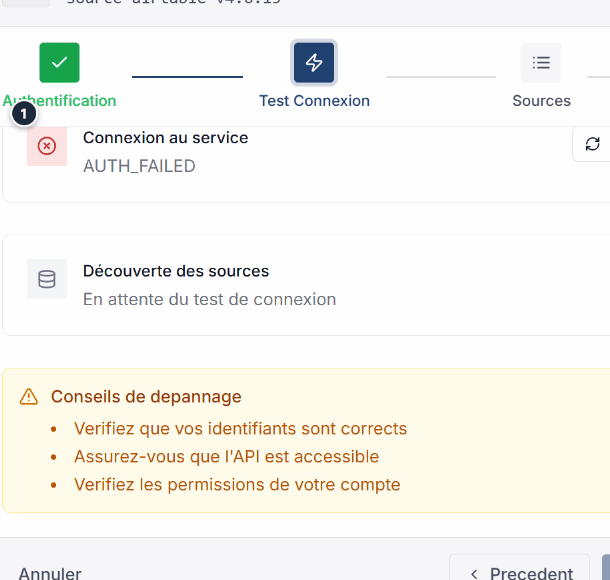
Common errors
| Error | Likely cause | Solution |
|---|---|---|
| 401 Unauthorized | Invalid or expired API key | Regenerate the key in the provider's console. |
| 403 Forbidden | Insufficient scopes or permissions | Check the permissions of your key. |
| Timeout | Service temporarily unavailable | Try again in a few minutes. |
Step 3 : Select data streams
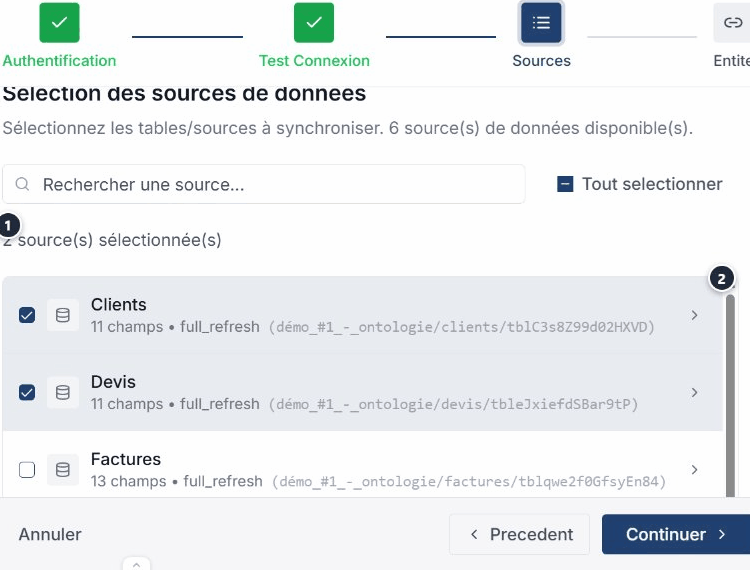
After a successful test, Ontologie discovers the available streams from your source. Check the streams you want to synchronize.
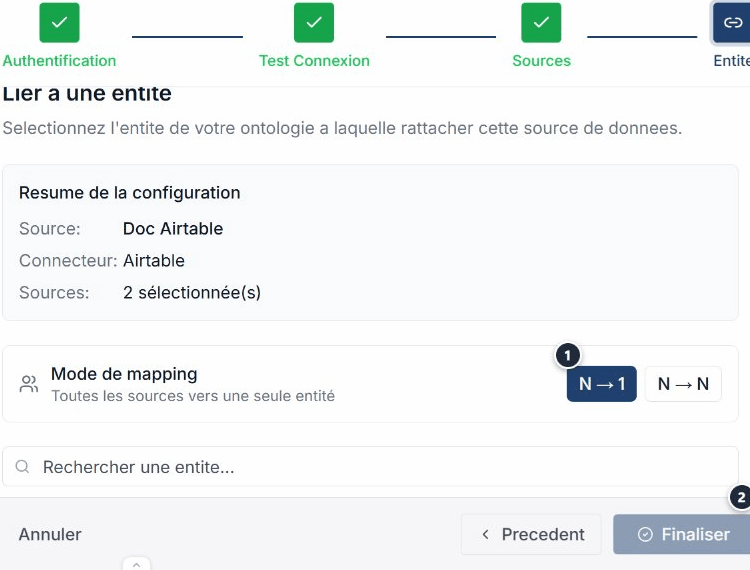
Step 4 : Link to an entity
Select the target entity in your ontology to receive the synchronized data.
Expected outcome
See also
- Connectors : Browse the catalogue and add a connector.
- Data Sources : Manage all your configured sources.
- Entity linking : Connect your sources to the ontology.
- Diagnostics : Identify and fix connection errors.
Need help?
Write to us: Support and contact.