
At a glance
Spaces let you segment your ontology into multiple independent canvases. Each space contains its own entities, relations, and history.
Before you start
- You have access to an Ontologie workspace.
- You have opened the Ontology module.
Example: create a "Supply Chain" space to model your suppliers and products, an "HR" space for your employees and departments, and a "Finance" space for your accounts and transactions. Each team works in its own space without interference.
Switch spaces
The space selector is in the canvas toolbar (the SPACES button). Click it to see the list of your spaces and switch between them.
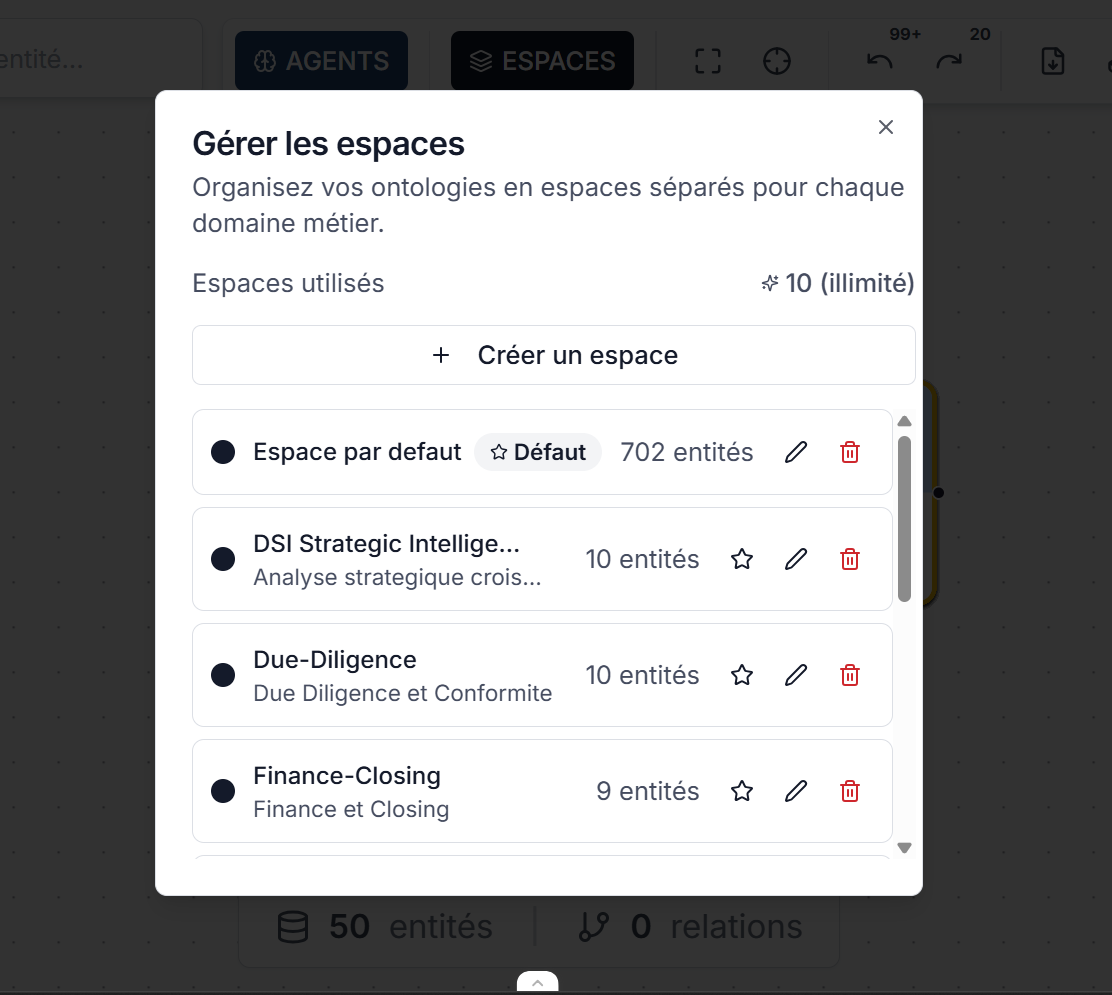
The active space is stored in the URL -- you can share a direct link to a specific space with a colleague.
Manage spaces
From the selector, click Manage spaces to:
- Create a space: give it a name, description, and color for visual distinction.
- Edit: rename a space or change its color.
- Set as default: the default space opens automatically on login.
- Delete: remove a space (the entities it contains will be deleted).
Available colors
Each space can have its own color for easy visual distinction in the selector. Ten colors are available.
Use cases
| Scenario | Suggested organization |
|---|---|
| One team, one project | A single space is enough. |
| Multiple business domains | One space per domain (Supply Chain, HR, Finance). |
| Environments | A "Production" space and a "Draft" space to test changes. |
| Different clients | One space per client if you manage multiple accounts. |
Expected outcome
Your spaces are configured to reflect your organization. Each team or domain has its own canvas, and you can switch between them in one click.
Limits and tips
- If you cannot find an entity, first check that you are in the correct space -- this is the most common cause.
- Entities in one space are not visible in another space. If you need to share a structure between spaces, export it as YAML and import it into the other space.
- The Navigator displays only the entities of the active space.
YAML export and import between spaces
To reuse an entity structure in another space:
- In the Modeler, select the entities to export.
- Click Export in the toolbar and choose the YAML format.
- Switch to the target space via the space selector.
- Click Import and select your YAML file.
Attention YAML import creates new entities : it does not update existing entities with the same name. Rename entities if needed before importing.
Common errors
| Problem | Probable cause | Solution |
|---|---|---|
| Entity not found | You are in the wrong space | Switch spaces via the selector |
| YAML import fails | Name conflict | Rename entities in the YAML before importing |
| No "Manage spaces" button | Insufficient permissions | Contact a workspace administrator |
See also
- Workspaces and spaces (concept) : Understand the workspace / space hierarchy
Need help?
Write to us: Support and contact.